Augraphy is an
image augmentation library designed to produce realistic text documents like you’d find in a business setting. In
this post, we’ll see how to define a new augmentation and use it in an Augraphy pipeline to generate new
documents.
Note: Plenty of shell commands and Python code will be shown along the way, so be prepared with your
terminal emulator and text editor of choice.
Getting Started
To work on your local machine, clone the project directory and
have a look around; we’ll be working primarily in augraphy/src/augraphy/augmentations.
Not ready to build locally? You can work in this Colab notebook, but be sure to
open another browser window so you can follow along with this guide.
Creating an Augmentation
The Idea
In this tutorial, we’ll be building an augmentation to add the motion blur effect. This imitates what happens when
you try to take a still picture from a moving vehicle; the colors are present, but the camera can’t properly focus, so
the image gets blurry. In our case, we want to simulate someone taking a picture of a document with a shaky hand, or
without pausing to focus their camera.
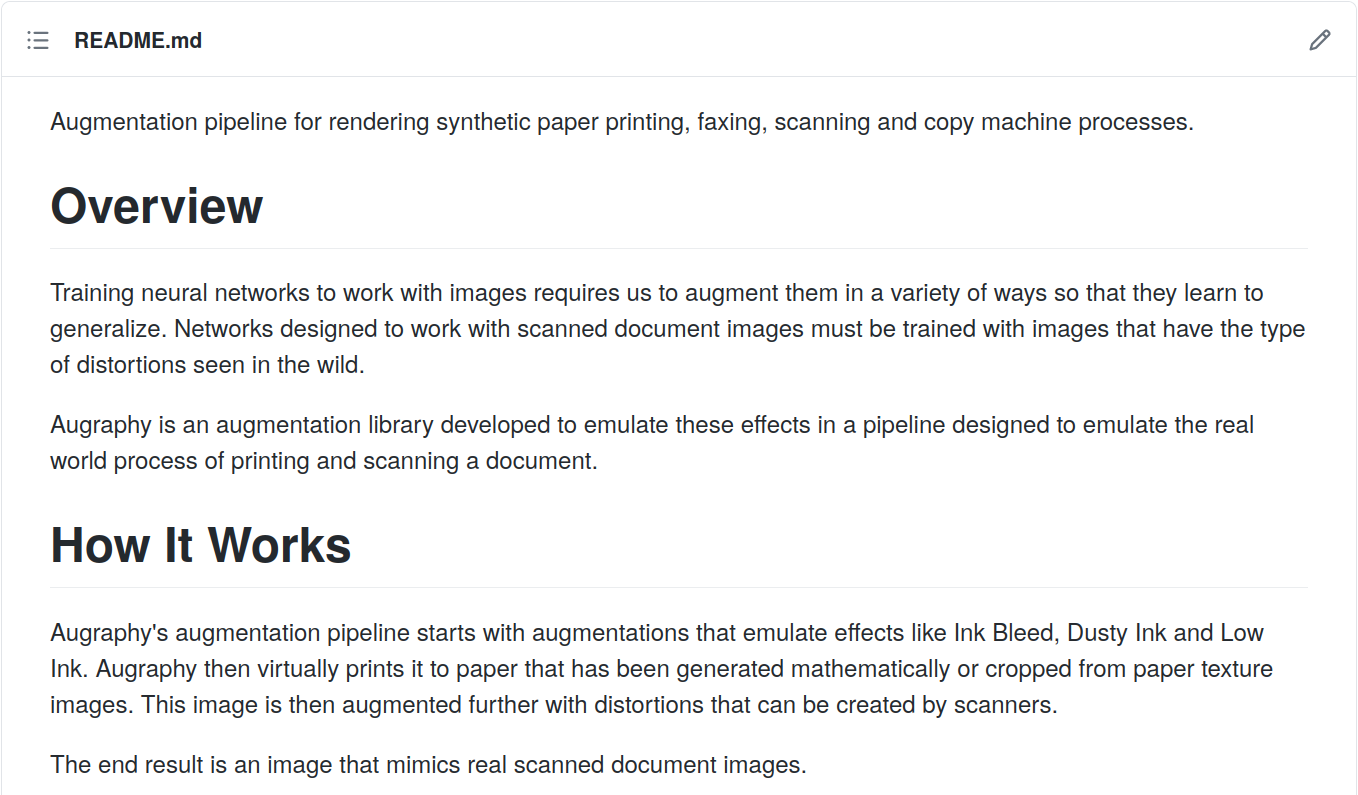
The Source Image
Since we’re building an augmentation for text documents, we’ll need a picture of some text to start with. I’ll use a
screenshot of the README in the GitHub repository for the Augraphy
project. If you’re following along in the Colab notebook or on your own machine, use an image of your choice – a
screenshot of this blog post is a great option!
Creating the Augmentation
Using your favorite text editor, make a new file in the augmentations directory, calledmotionblur.py.
Every augmentation in Augraphy is a class which inherits from the Augmentation class inaugraphy.base.augmentation. Every augmentation also creates an AugmentationResult object
containing the transformed picture (after applying the augmentation), and the augmentation object that was used to
produce that picture. Most augmentations in Augraphy use numpy native methods or the OpenCV library to operate on numpy arrays,
which represent the images we’re transforming. We’ll import the classes and packages we need, and define our own now.
To be good open source citizens, we’ll also add a docstring comment to our class, explaining its intended use. By convention, we name augmentation classes after their intended effect, and append Augmentation to that name, like so:
from augraphy.base.augmentation import Augmentation
    from augraphy.base.augmentationresult import AugmentationResult

    import cv2
    import numpy as np

    class MotionBlurAugmentation(Augmentation):
        """Creates a motion blur effect over the input image."""
The Blur Function
Before we continue creating our class, we need to think about how exactly this
blurring effect should be computed. In image processing, we usually apply
effects like this by using a small matrix called the kernel (in
Augraphy and elsewhere, represented as a numpy array) to
represent the change in the image, then computing the matrix convolution of
the kernel and another matrix representing the original image. The result is a
new matrix which represents the original image altered in some way, in this
case blurred. To achieve this effect in our augmentation, we’ll make anumpy array to serve as our blur kernel and use the
filter2D
method
from OpenCV to perform the convolution.
The Blur Kernel
A motion blur kernel computes the average of pixel values in the direction of
the blur. In our case, we’ll apply a horizontal blur, so we’ll only be
concerned with the row in the matrix that corresponds to the horizontal
direction. We’ll start with a 3×3 matrix to keep things simple:
dimension = 3

kernel = np.zeros((dimension,dimension))
Every entry of this matrix is a zero currently, because we don’t care about
most of the image; we’re only blurring in one direction. We’ll change the row
corresponding to the horizontal direction to ones now, and then divide each
entry by the dimension of the matrix, so when the convolution is computed, the
result of that row multiplication is the average value of pixels in that
direction.
dimension = 3 # the matrix will be a 3x3 square

kernel = np.zeros((dimension,dimension)) # make an empty array
kernel[1,:] = np.ones(dimension) # the horizontal direction should be nonzero
kernel = kernel / dimension # now the entries in the horizontal direction sum to 1
Applying the Blur
Now that we have our blur kernel, we need to compute its matrix convolution with the matrix representation of our
input image. I named the image README.png, and we’ll use cv2 to read that into memory now:
image = cv2.imread("README.png")
cv2.imread returns a numpy.array representing the input, so all that remains is to compute
the convolution. For this, we’ll use cv2.filter2D,
which convolves images with kernels. We’ll pass this function the input image, the kernel to convolve by, and our
desired output bit-depth. In this case, we want the same bit-depth as the original image, so we could preserve color
values if there were any, and so we pass -1 for this value:
blurred = cv2.filter2D(image, -1, kernel)
Assembling the Function
Now that we have the building blocks of our motion blur function, let’s put it
all together. Because this transformation only required a relatively small
amount of code, we can go ahead and just put it all in the__call__ method of our MotionBlurAugmentation class.
class MotionBlurAugmentation(Augmentation):
	"""Creates a motion blur effect over the input image."""

	def __call__(self):
		image = cv2.imread("README.png")

		dimension = 3 # the matrix will be a 3x3 square

		kernel = np.zeros((dimension,dimension)) # make an empty array
		kernel[1,:] = np.ones(dimension) # the horizontal direction should be nonzero
		kernel = kernel / dimension # now the entries in the horizontal direction sum to 1

		blurred = cv2.filter2D(image, -1, kernel)
To fit this augmentation into the Augraphy ecosystem, we need to make a few
changes. Every Augmentation has a probability of being executed
and a should_run method which determines at runtime if that
augmentation will be applied. These are defined in the parent class, so we’ll
address this in our __init__ method. We also allow the
probability check to be overridden by passing aforce=True parameter in the call to our augmentations. Let’s add
these now:
class MotionBlurAugmentation(Augmentation):
	"""Creates a motion blur effect over the input image."""

	def __init__(self, p=0.5):
		"""Constructor method"""
		super().__init__(p=p)

	def __call__(self, force=False):
		if force or self.should_run():
			image = cv2.imread("README.png")

			dimension = 3 # the matrix will be a 3x3 square

			kernel = np.zeros((dimension,dimension)) # make an empty array
			kernel[1,:] = np.ones(dimension) # the horizontal direction should be nonzero
			kernel = kernel / dimension # now the entries in the horizontal direction sum to 1

			blurred = cv2.filter2D(image, -1, kernel)
We’re almost there, but we have one more piece to consider.
Pipeline Layers
Augraphy pipelines execute augmentations in several stages, called layers.
This allows for fine-grained control over the generated effects and produces
much more realistic outputs than other methods. Because we’re trying to
replicate a moving camera taking a picture of a document, we want that
document to be otherwise complete when we apply our blur effect, rather than
applying the blur to the ink itself, or to the underlying paper. In this case,
we’ll be applying our augmentation in the “post” layer, after the document is
“printed”. Augmentations are defined as part of an Augraphy pipeline, which
uses the augmentations to produce a dictionary containing the results of each
augmentation in each layer of the pipeline. The Augraphy pipeline passes this
dictionary into each augmentation, where the most recent result image is
retrieved and operated on. After the augmentation is applied, a newAugmentationResult object is added to the dictionary, and
execution passes back to the pipeline. We won’t read the source image directly
from this augmentation, but instead write a script to test this as part of a
pipeline later. To finish up our augmentation, we need to make these final
changes now.
from augraphy.base.augmentation import Augmentation
from augraphy.base.augmentationresult import AugmentationResult

import cv2
import numpy as np

class MotionBlurAugmentation(Augmentation):
	"""Creates a motion blur effect over the input image."""

	def __init__(self, p=0.5):
		"""Constructor method"""
		super().__init__(p=p)

	def __call__(self, data, force=False):
		if force or self.should_run():
			image = data["post"][-1].result # get most recent image from post layer

			dimension = 3 # the matrix will be a 3x3 square

			kernel = np.zeros((dimension,dimension)) # make an empty array
			kernel[1,:] = np.ones(dimension) # the horizontal direction should be nonzero
			kernel = kernel / dimension # now the entries in the horizontal direction sum to 1

			blurred = cv2.filter2D(image, -1, kernel)

			data["post"].append(AugmentationResult(self, blurred))
And that’s it! This is a full augmentation, ready for testing in a pipeline.
Save the file and pat yourself on the back.
A Basic Pipeline
Now that we have our augmentation ready to go, we need to test it. In this
section, we’ll build a simple Augraphy pipeline which only contains our blur
effect, and we’ll use this to “dial in” the result we want to see. Use your
text editor to create a new file called test.py in theaugraphy/src directory; we’ll define our test pipeline here and
see the effect of MotionBlurAugmentation.
Imports
In this file, we’ll need to import a few things:
- the
AugraphyPipelineclass fromaugraphy.base.augmentationpipeline, - the
AugmentationSequenceclass fromaugraphy.base.augmentationsequence, - our new
MotionBlurAugmentationclass fromaugraphy.augmentations.motionblur
from augraphy.base.augmentationpipeline import AugraphyPipeline
from augraphy.base.augmentationsequence import AugmentationSequence
from augraphy.augmentations.motionblur import MotionBlurAugmentation
Pipeline Layers
Execution of the pipeline occurs in layers, or phases; we’ll now define the
ink, paper, and post phases. Because we only want to evaluate our newMotionBlurAugmentation, we don’t want to modify the input image
with any other augmentation, and so we’ll leave the ink and paper phases
empty, using the None keyword. In Augraphy, an empty pipeline
phase is represented by an AugmentationSequence object containing
an empty list. We’ll only add theMotionBlurAugmentation constructor to the post phase, and set its
probability of executing to 100% (p=1). Most of the Augraphy base
classes inherit from Augmentation and themselves have a
probability of being run, so we make sure to set that probability in the
constructor too, guaranteeing execution of our test.
ink_phase = None
paper_phase = None
post_phase = AugmentationSequence([MotionBlurAugmentation(p=1)], p=1)
Wrapping Up
We’re now in a position to put test.py together. AnAugraphyPipeline constructor takes the three phases as required
arguments, but also has other optional arguments you may be interested in
modifying in your own code. We’ll want to use cv2 to read our
example image in, and to display the augmented image in a new window, so we’ll
also add that to our imports here.
# test.py

from augraphy.base.augmentationpipeline import AugraphyPipeline
from augraphy.base.augmentationsequence import AugmentationSequence
from augraphy.augmentations.motionblur import MotionBlurAugmentation

import cv2

ink_phase = None
paper_phase = None
post_phase = AugmentationSequence([MotionBlurAugmentation(p=1)], p=1)

pipeline = AugraphyPipeline(ink_phase, paper_phase,	post_phase)

image = cv2.imread("README.png")

blurred = pipeline.augment(image)

cv2.imshow("motion-blur-output", blurred["output"])
cv2.waitKey(0)
Running the Test Pipeline
As long as README.png is in our top-levelaugraphy directory (for this example,~/projects/augraphy), we should be able to runpython src/test.py from there and see a result:
~/projects/augraphy/ $ python src/test.py
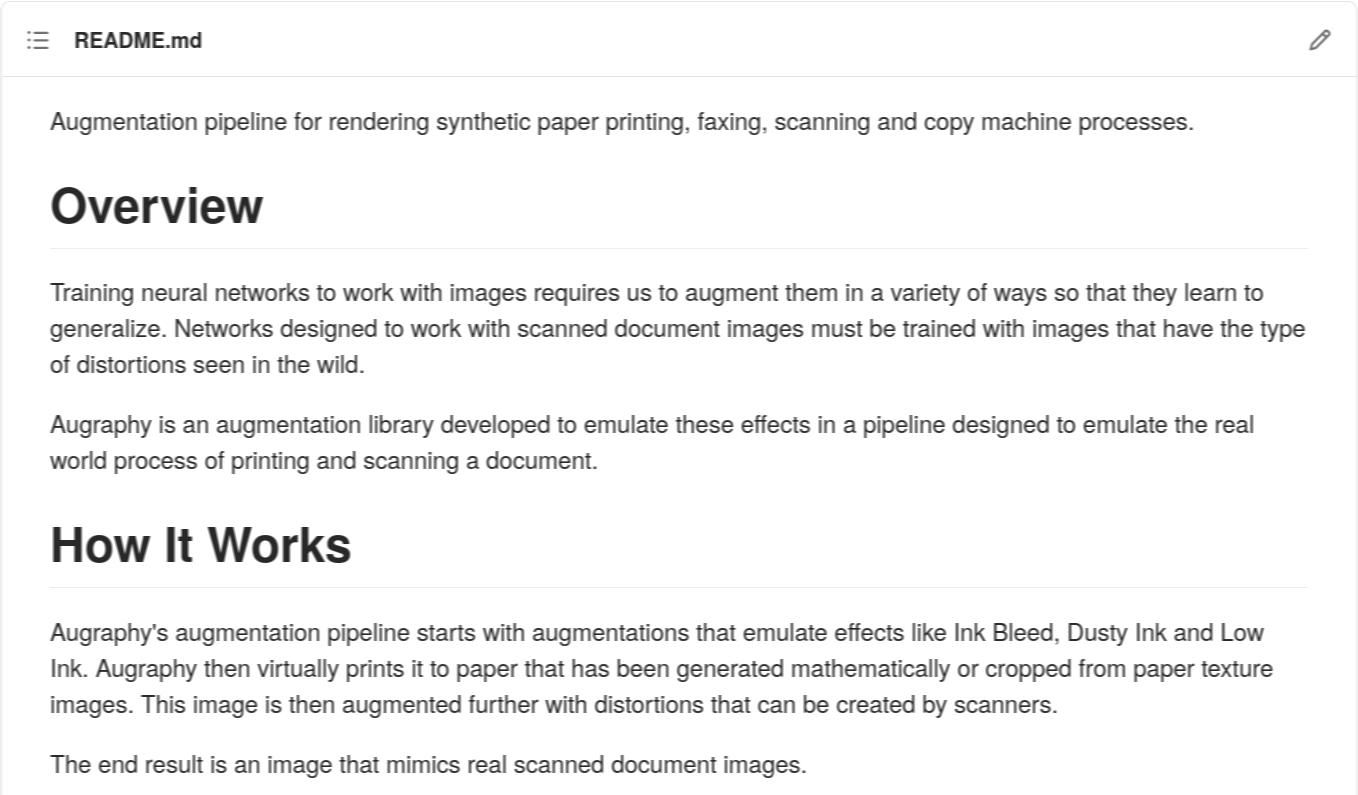
The effect is there, but it’s too subtle. Let’s turn the dial to 11!
Increasing the Blur
To intensify the blur effect, we only need to make our kernel matrix larger:
# dimension = 3 # the matrix will be a 3x3 square -- NOT GOOD ENOUGH
dimension = 11 # the matrix will be an 11x11 square -- MUCH BETTER
We’ll also need to change the row that corresponds to the horizontal
direction; remember, this was the middle row of the matrix. Now that our
matrix is 11×11, this will be the 6th row:
# kernel[1,:] = np.ones(dimension) # the horizontal direction should be nonzero
kernel[6,:] = np.ones(dimension) # the middle direction should be nonzero
Make these edits to test.py and run the script again.
~/projects/augraphy/ $ python src/test.py
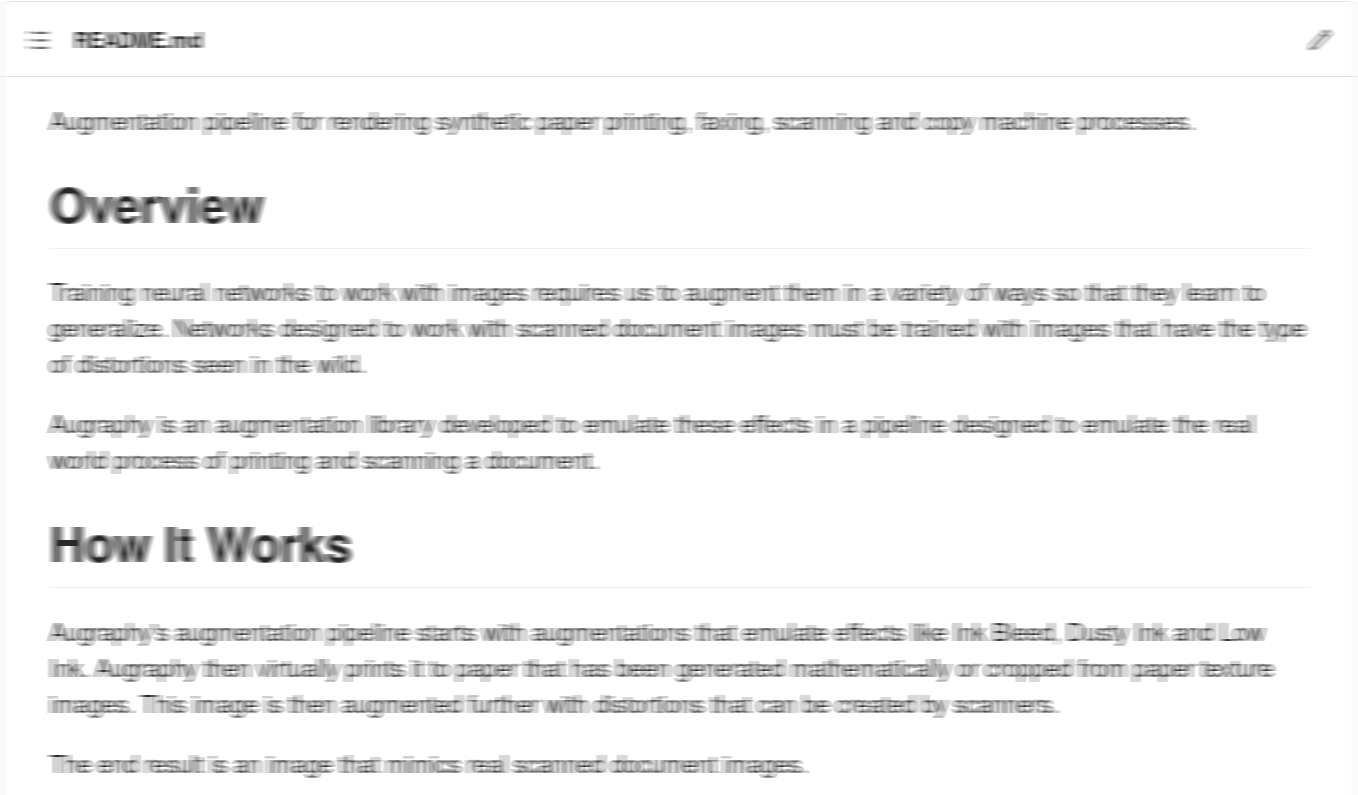
Now that’s blurry!
End of the (Pipe)line
In this tutorial, we’ve seen how to move from an idea for a new augmentation
to a working implementation in just a few lines of code. We also built a tiny
Augraphy pipeline to test our work, and used this to find better default
constants for a more dramatic effect. This is the basic workflow you’d use to
develop new augmentations with this project, and it’s what we at Sparkfish do
internally as we continue development on this awesome library. Next time,
we’ll look at using existing augmentations to build a custom pipeline, which
we’ll use to produce a large set of images for training machine learning
models.
